

Have you ever wondered how mainstream corporations maintain their cloud infrastructure as cost-effectively and efficiently as possible? Wonder no more. In this blog post, we will go over the basics of cloud management through open-sourced software provided by HPCC Systems.
To understand how cloud deployments work on Azure, we must have a general idea of how the aforementioned services interact with each other. (Kubernetes, Docker, and Helm)
Kubernetes is an open source platform that automates Linux container operations. In other words, you can cluster together groups of hosts running Linux containers, and Kubernetes helps you easily and efficiently manage those clusters. Kubernetes allows for easy development of microservice applications as opposed to the archaic monolithic designs of the past. However, K8s is only a container which runs code that is packaged and structured through Docker and Helm. Docker is a containerization technology, which shares similiarities to Kubernetes in the fact that they both operate Linux Containers. The Docker containers are managed by Helm (version control/storage/etc) through yaml config files. Think of Helm as an application manager. The rules that are specified by Helm are then applied to Kubernetes for better uniformed management.
Now that we have a basic understanding of how Kubernetes, Docker, and Helm work together - we can begin with a hands-on lesson.
There are several methods of setting up a new AKS cluster, but as a wise man once said: all roads lead to Rome.
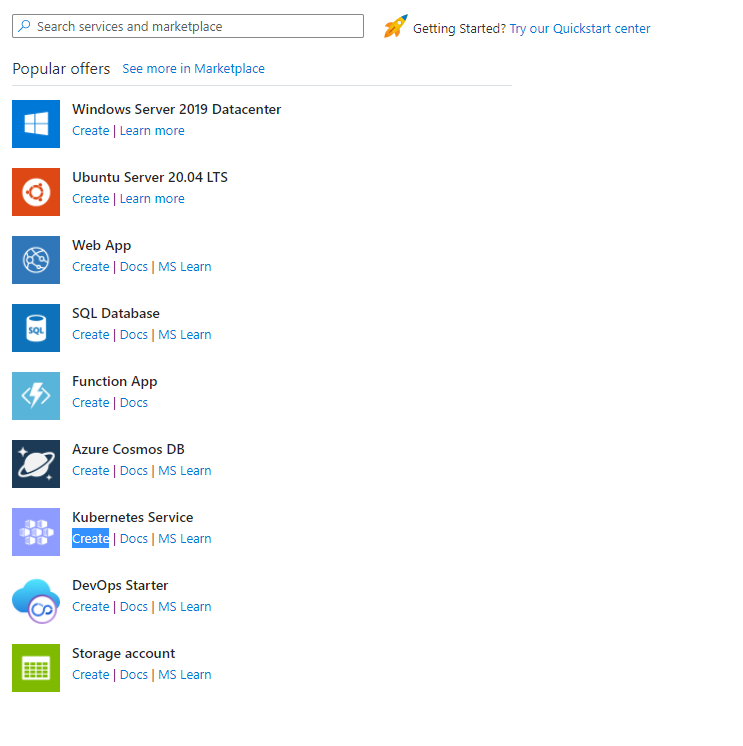
Navigate over to Azure Portal and select the “Create a resource” option.

Next, select “Create” under the “Kubernetes Service” option.
Finally, create the cluster and cluster resource according to your specifications. A more in-depth guide can be found here.
Following the creation of your AKS cluster, you will be given an option to “connect” to your cluster through the Azure CLI. There are a series of commands you must enter in order to successfully connect. (NOTE: We are operating under the assumption that you have already authenticated yourself through the Azure CLI)
az account set --subscription YOUR_SUBSCRIPTION_ID
az aks get-credentials --resource-group YOUR_RESOURCE_GROUP --name CLUSTER_NAME
Now we should be able to run any kubectl command!
This part is very straightforward. Clone the HPCC Helm repository from Github.
Now, I’m sure you’re fingers are aching to write code. Well, ache no more! The Helm chart repository provided will NOT work out of the box - which means it requires us to update some of the yaml configurations. (Hooray!)
First, in helm/examples/local/hpcc-localfile/values.yaml add the following under “planes:”
- name: dropzone

  subPath: dropzone # cannot currently be changed

  size: 3Gi

  labels: [ "lz" ]

  rwmany: true
Next, in helm/examples/local/values-localfile.yaml add the following under “planes:”
- name: dropzone

    pvc: dropzone-localfile-hpcc-localfile-pvc

    prefix: "/var/lib/HPCCSystems/dropzone"

    labels:

    - lz
Kaching! You’re done! (For now… mwahahahaha)
Although it appears as though we are only uploading the configuration files from our Helm repository, we are actually doing much more than that. This is thanks to Helm. Once we push the configuration files to AKS, Helm will search dockerhub for our resources and automatically append them to our cluster. All that’s left for us to do is to specify the version that Helm should be searching for. Oh… the wonders of technology :).
In helm/hpcc/Chart.yaml and in helm/hpcc/values.yaml edit the “version” components with the version you require. (CHECK DOCKERHUB!!!) Next, all that’s necessary is the deployment commands for Helm.
helm install azstorage .\helm\examples\azure\hpcc-azurefile\
helm install YOUR_VERSION_NAME .\helm\hpcc\ --set global.image.version=YOUR_VERSION -f .\helm\examples\azure\values-retained-azurefile.yaml
kubectl get pv
kubectl get pods
You’re finally done!!! Congratulations!